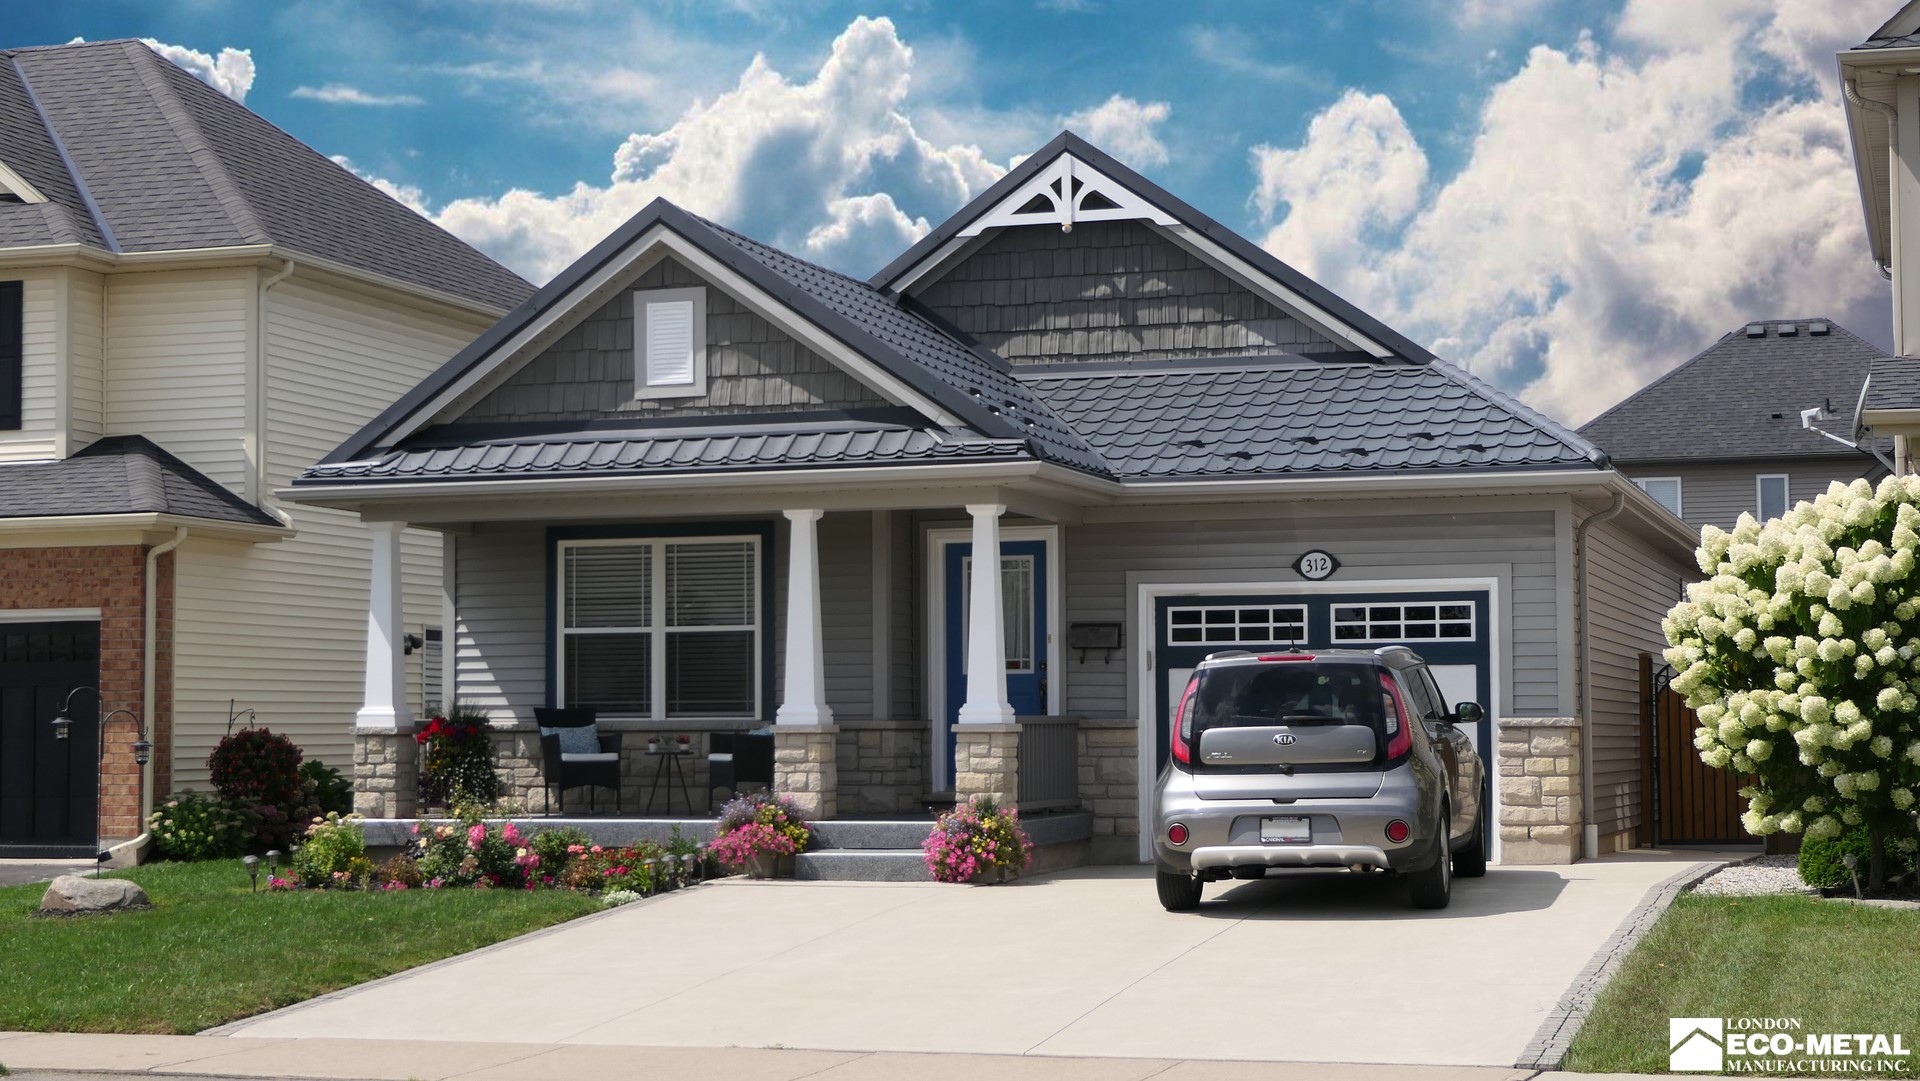
Why Metal?
Pros:
Beauty and function - Metal roofs look better and last longer,
Excellent long term investment - Lowest cost per annum coverage,
Fire resistant - Class A fire resistant,
Wind resistant - Class A wind resistant (up to 150 km/h),
Light weight - Eliminating structural sagging,
Moisture resistant - Treated metal and finishes resist oxidation,
Stain resistant - Mildew resistant, unlike asphalt shingles,
100% recyclable materials - Environmentally friendly,
Tax savings - Energy tax credits available for metal roofing purchases
Insurance savings - Homeowner insurance with lower rates
No maintenance required..
Cons:
Higher Upfront Cost
Slightly Louder During Percipatiton
Variety of Styles and Colors
COLORS
SLATE GREY
TERRA COTA
CHOCOLATE BROWN
COLONIAL RED
JUNGLE GREEN
BLACK
WHITE RAL
BROWN MOCHA
BLUE GREY
NOVA
ANTOCHADO
Process of Installation
1
The first step in metal roofing installation is application of a roofing membrane. If a roof is covered with only one layer of shingles, it is possible to install the membrane directly over them.
2
When roofing membrane is properly attached the next step involves installation of vertical strapping for better ventilation.
3
In the third step horizontal strapping is installed on top of the vertical one. It acts as a base for the metal roofing material.
4
When chosen by the customer roofing product is in place we install inside flushing.
5
The last step involves installation of final decorative elements of the roofing system.
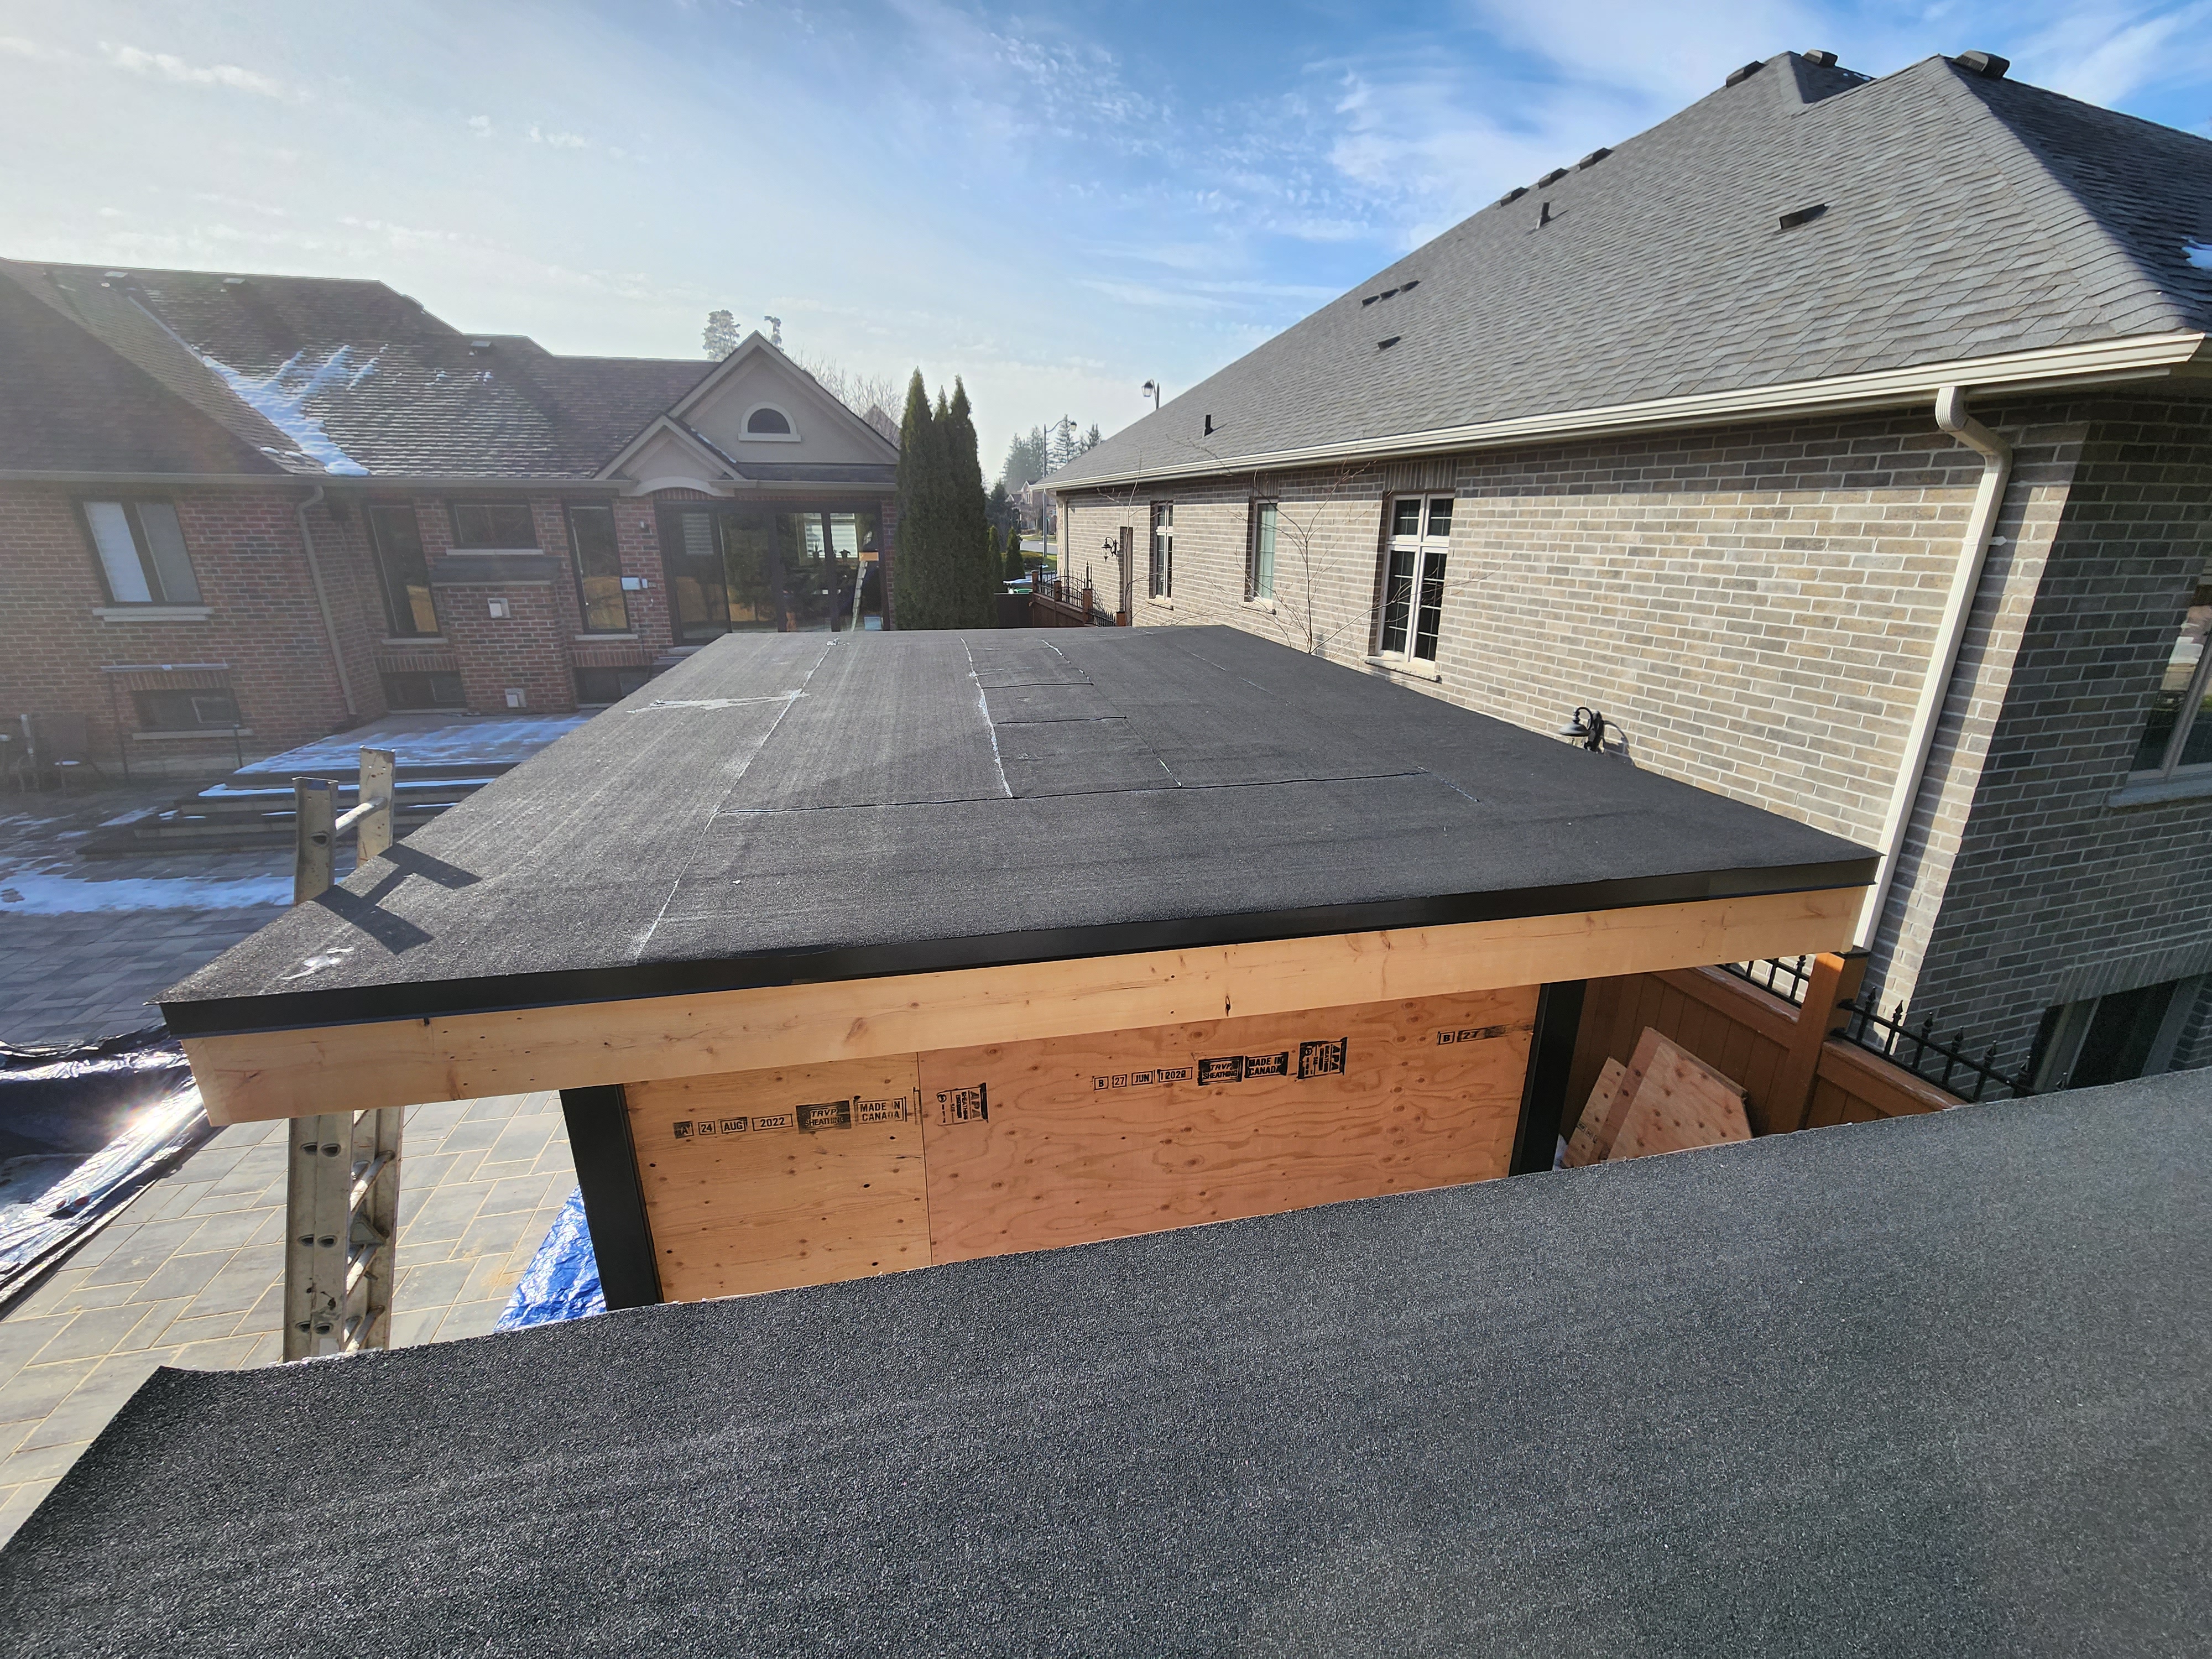
Rolled Roofing
A rolled roof is a type of roofing material that consists of a roll of asphalt-impregnated felt. It is also known as a rolled roofing membrane or a mineral-surfaced roofing membrane. Rolled roofing is typically used on low-slope roofs, such as those found on porches, sheds, and outbuildings.
This product is the best way of covering low-incline roofs.
Variety of Colors
COLORS
GREY
BROWN
RED
BLACK
WHITE
Process of Installation
1
Prepare the roof by removing any old roofing material, debris, or nails. The surface of the roof should be clean and smooth.
2
Install a layer of underlayment on the surface of the roof. This will serve as a base for the torch-down roofing material and protect the roof from moisture.
3
Measure and cut the torch-down roofing material to fit the length of the roof.
4
Roll out the torch-down roofing material on the roof, making sure it is centered and even. Then, using a propane torch, heat the material and melt it onto the surface of the roof. As the material melts, it should bond with the underlayment and create a watertight seal.
5
Once the first layer of torch-down roofing material is installed, repeat the process for a second layer. This will provide additional protection against leaks and ensure a durable, long-lasting roof.